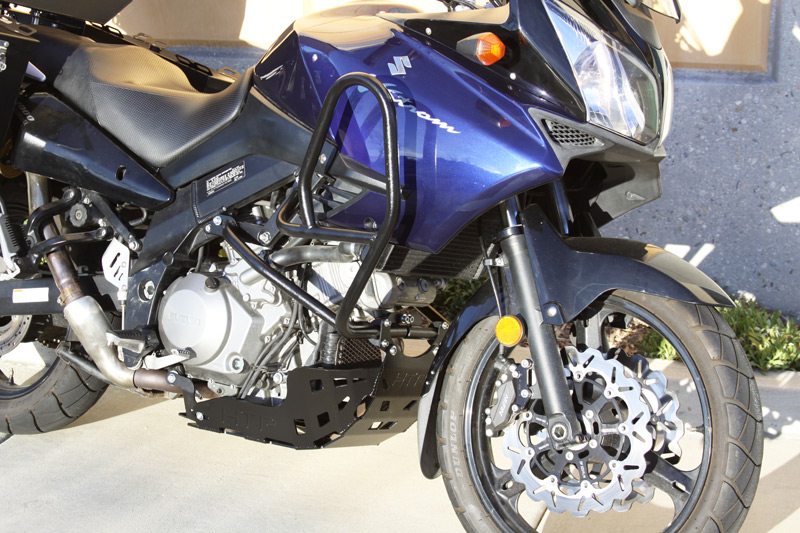
For our 2005 V-Strom 1000 project bike, which had been damaged in a crash, we had the bodywork repainted by Born Again Fairings, bolted on a set of Touratech hand guards, installed panniers and a top box from Happy Trails, and upgraded the front brakes and fork with a Caliper Adapter Bracket (which allowed us to bolt on 4-piston sportbike calipers) and StromBrace from SV Racing Parts.
Read our story, “Born Again Fairings: Giving New Life to Damaged Bodywork”
Read our Happy Trails Panniers and Top Box Review
Read our SV Racing Parts Caliper Adapter Bracket and StromBrace Review
The V-Strom had a set of well-worn aftermarket engine guards that protected the bike in the crash and a couple of parking lot tipovers in years past, but they were scratched up, rusty and had badly corroded hardware. We turned again to Happy Trails for a new set of engine guards—what it calls PD (Paris Dakar) Nerf Bars—as well as a skid plate to protect the underbelly, both of which have a Black Hammertone powdercoat finish that matches the panniers and top box. Adding the skid plate protects exposed vitals such as the exhaust header, oil pan and oil filter, which is mounted low in the engine toward the front.
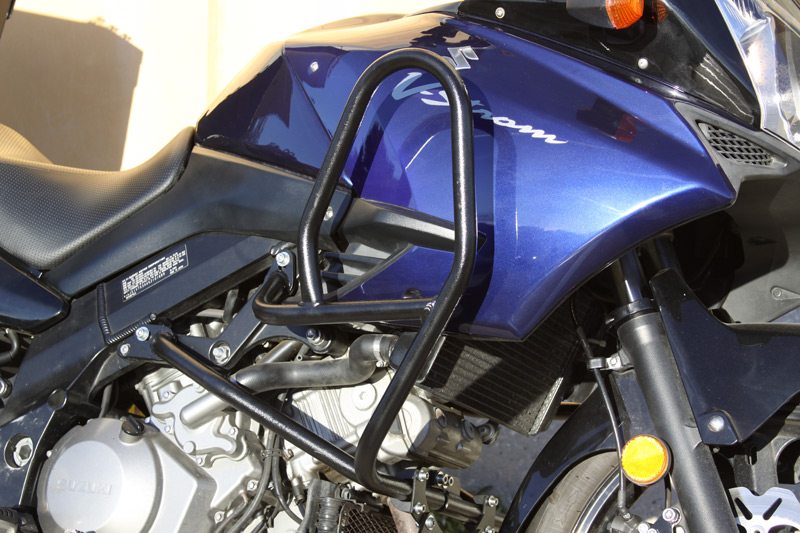
The Happy Trails skid plate uses an engine guard cross-brace as its front mounting point, and available mounting kits are compatible with Happy Trails PD Nerf Bars as well as AltRider, Givi, Suzuki OEM or SW-Motech engine guards. We started by installing a set of PD Nerf Bars ($299.99), which are compatible with all model years of the Suzuki V-Strom 1000 and 650 (they’re also available for a wide range of other motorcycles; see the Happy Trails website for fitment range). They’re made of 1-inch drawn-over-mandrel (DOM) steel tubing, and the kit comes with all of the necessary mounting hardware. Installation instructions with photos are included, and they went on quickly and easily.
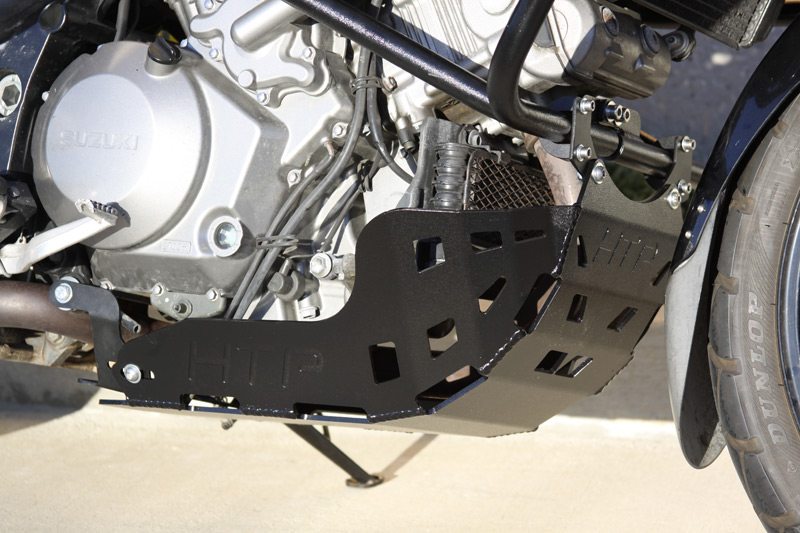
Installing the 3/16-inch welded aluminum V-Strom Skid Plate ($166.95, plus $50-$68 for mounting kit; compatible with 2002-13 DL1000 and all model years of the DL650), however, proved to be a time-consuming endeavor. First of all, you’ll need to remove the plastic lower cowl—easy to do, but it’s not mentioned in the installation instructions. Then you’ll embark on the arduous task of removing the two 17mm bolts that hold on the sidestand assembly (which serve as one of the two frame mounting points) because they’re crowded by the exhaust pipe and centerstand, making it a knuckle-busting, head-stripping challenge to get a wrench on them. We succeeded in removing the bolts, but the 12mm lock washers that go with the M1235C replacement bolts didn’t fit, and widening them in a vice didn’t work. Luckily we found a pair of washers in Editor Tuttle’s collection of miscellaneous hardware. By this point an hour had gone by and we were just getting warmed up.
Removing the sidestand assembly bolts is tough, but putting them back in is all but impossible because the frame mounting plate for the skid plate further restricts access. With much effort and cursing, we finally got the bolts started and painstakingly made a few turns on the wrench, only to find that we’d cross-threaded one of them. We took the bike to Editor Tuttle’s home shop, put the bike up on his lift (which made getting access to the underside of the bike much easier), removed the bolts, cleaned the threads with a tap and die, and then sighed with exasperastion at the prospect of trying to get them back in. Looking for a better way, we decided to remove the exhaust header and center collector (the two mufflers stayed on the bike), which gave us clear and direct access to the sidestand assembly bolts. But with the U-shaped frame mounting plate now attached on the left side, it got in the way of us putting the exhaust pipes back on. Leaving the mounting plate’s right-side bolt (one of the exhaust pipe’s mounting points) out, we bent the U-shaped plate down and away until we could squeeze the exhaust pipe through. Once we put everything back together and attached the front mounting plate to the Nerf Bar cross-brace, bolting the skid plate to the two mounts was easy.
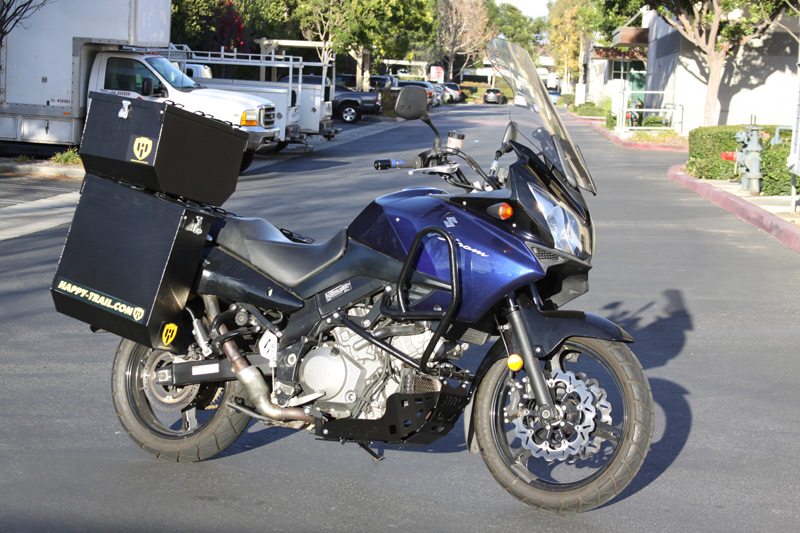
All in all, installing the Happy Trails engine guards was easy, but installing the skid plate was a 4-hour ordeal that we hope never to repeat. The engine guards and skid plate look sharp, they match the Happy Trails luggage and both are very sturdy, providing vital protection to vulnerable and expensive bodywork and engine components. Removing four bolts is all it takes to take off the skid plate for access to the oil drain plug and filter. But bear in mind that, in addition to installation challenges, the skid plate reduces center ground clearance by nearly 2 inches.
FOR MORE INFORMATION:
Call Happy Trails at (800) 444-8770 or visit happy-trail.com




For those of us in the KLR community, the HT crash bars are way down the list of options. Our experience for installation is opposite of the V-Strom. Installing the bars is a pain, but the plate goes on fairly easily. However, the most disappointing thing about HT crash bars is their cross brace. With a simple tip over that cross brace crumples like cardboard. Although the plate goes on fairly easily, it makes no sense the way it’s mounted. Why not use the OEM mounting points? Again, there are better options than HT.
The Link at the bottom of the article “Happy Trails Skid Plate and Engine Guards” is bad. Do you have the correct one?
Thanks
Jeff
Jeff, thanks for pointing this out but it seems to be working fine for us. Maybe there was a glitch for awhile. Please try again and let us know if you have success.