Close your eyes. Breath in deep. You’re in a leather shop. Warm memories of your first leather jacket, vests with fringe and, of course, saddlebags, flood through your brain. Open your eyes. There are two beautiful, tan women standing in front of you with beautiful jewelry and long braids. Blink twice. Are you dreaming this? Sadly… yes. But you love what you see in front of you just as much.
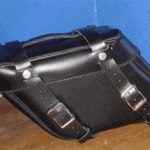
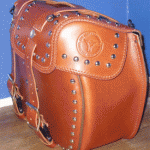
That is how I felt when I opened the Leatherworks Inc. box addressed to me this morning to reveal two beautiful saddlebags. The first bag, a black leather 112+2 bolt on braid saddlebag (Product No. 112BOBR+2), is a bag from the Leatherworks regular collection with a custom 2-inch braid addition. The second bag, a brown 120 custom bag which shows many of the custom options Leatherworks offers (Product No. 120BOBRBWSLK2), is a made-to-order saddlebag that Leatherworks hand crafts to your particular order specifications.
Reviewing these bags comparatively would be like asking a mother to compare her two daughters. Each daughter is beautiful in her own way, attracts her own following and has her own interests and purpose. That being said, I am going to discuss the two Leatherworks saddlebags here by the same criteria but independently; putting one up against the other wouldn’t be fair nor would it make sense considering these bags are not intended to be the same.
The outside: How the bags look and feel
There is something very special about the feel of high-quality leather: smooth on the outside and soft and velvet-like on the inside. For me, and I don’t think I am alone on this, leather is like the comfort food of textiles. Think mashed potatoes and gravy; a classic that never goes bad.
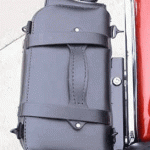
American-made from the heaviest leather being used in the industry (10-12oz American, tanned, struck-through leather), these bags feel great in your hands. A visual walk-around of these bags reveal two classically-styled leather closure straps with silver buckles in the front, coordinated piping (colored piping is a custom option), clean color-coordinated stitching around the edges, a leather carry handle at the top, decorative Indian Head Nickels and four clips on the lid for the attachment of extra luggage with bungee cords. The bottom of the bag has two strategically placed leather straps to tuck the ends of the extra-long buckles into so nothing flaps in the wind.
What you do not see when the bag is installed: ABS plastic reinforcement sewn into the tops of the bags to support extra luggage and increase bag life, hard backs made of conveyor belt rubber reinforced with ABS plastic to keep your bags sturdy on the road, and quick-release hard plastic buckles for easy open and close convenience hidden behind the two classic-looking leather buckles on the front.
The buckles do a great job covering these quick-release connectors; when I took the saddlebags out of the box I didn’t even see the connectors and opened the bag by unbuckling. When I discovered the connectors, I re-buckled and used the connectors. This was much easier and faster!
I love how these bags seamlessly incorporate modern convenience with classic styling. When you look at this bag you see a very classic style your biker friends from forty years ago might have touted on their first Harleys. A classic style that, like mashed potatoes, never goes out of style. You do not see ABS plastic, conveyor belt rubber, or quick-release clips—all progressive elements you want to take advantage of but do not want to be the main focus on a bag like this.
Going Custom: The Above and Beyond Options
These bags carry a great blend of texture that makes them both a joy to look at and a joy to touch. Both my test bags include braiding along the lip of the lid that feels nice on your fingers when you open the bag and adds a nice detail. From here is where the bags take separate roads.
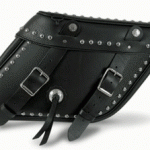
The black leather 112+2 braid saddlebag is like an excellent hot-fudge Sunday. The basic black bag is like a scoop of hand-made vanilla ice cream on a hot day and that +2 braid is like the hot fudge that takes the basic splendor of hand-made ice cream to another level of enjoyment. The braid, like the fudge, is a custom option and you can take it or leave it depending on your taste preference.
Now, the brown 120 custom bag is like a banana split, aka, the ice cream for the woman who wants it all. You start with the classic scoop of hand-made ice cream, and then you add…and add… and add to your heart’s desire. Our custom bag added braid around the lip, a basket weave detail to the lid, chrome studs along the lid and the body of the bag, medium brown leather in exchange for the standard black and a key lock in the front to top it all off.
I like how seamlessly the 120-custom incorporates all these detailed extras without the bag looking overly busy. The weaving and studs are placed strategically and appropriately to work together to make a well accessorized bag. The key lock lays flush against the front of the bag and functions beautifully with a spring-loaded in-bag saw-tooth-style locking mechanism that clicks into place with little effort (when you want it to) when you close the lid. Even if you’re a basic bag, forget the flair, kind of saddlebag owner, I’d recommend adding this key lock to any saddlebag.
Obviously there are hot-fudge Sunday people who like to keep it simple and basic and there are banana-split people who enjoy the extras in life and don’t mind paying the extra buck for double whipped cream and sprinkles. It’s nice that Leatherworks respects your right to choose and offers a wide-variety of options for all types of riders.
Installation: How long does it take? Do I need tools, a jumbo jet or a handy man?
Leatherworks has their own detachable installation system from Great Bike Gear called Easy Brackets. With over 80 kits offered for Harley-Davidson, American, Cruiser and even Metric models, the kits are made specifically for your motorcycle make and model (there are eight Dyna kits for instance). Since the kits are made model-specific to work with the body of your bike, the Sportster, Softail and Dyna kits do require turn signal relocation (to the license-plate mount) in order to compensate for the size of the saddlebags against the side fender.
The packaging says the Easy Brackets can be installed in 30-minutes or less, but installation does involve drilling four 3/8-inch holes in the back of your saddlebag. Since we plan to give away our black 112+2 braid bags to one lucky reader, this section is an over-view and not a hands-on test (in order to keep the bags universal).
Installation Steps
For all models other than the three mentioned above, there are eight basic steps to installing the Easy Brackets. I would not consider myself a grease monkey (I am that person that has trouble programming my VCR) but I do not feel intimidating by the installation steps for these brackets. I might be a little nervous drilling the holes in my bag myself (since there’s no going back if you put the hole in the wrong place) but I feel confident I could perform the other seven steps by myself, and anyone who is confident with a drill could perform all eight on their own. You’ll need a standard bolt wrench, a hex wrench and a drill. The steps are as follows:
1) Start on the throttle side of the motorcycle (right side). Remove first fender bolt (these should be removed one at a time to prevent movement of the fender).
2) Install new docking post and bolt where fender bolt used to be. (Bolt goes through and attaches docking post.) Repeat steps one and two for the second right-side fender bolt and post.
3) Unlock the Easy Bracket unit with the key, mount the Easy Bracket on the bike via docking posts (without the saddlebag attached: this is to mark on saddlebag where you need to drill the holes), lock the Easy Bracket back into place with the key (so it stays on by itself).
4) Step four requires a friend. Person one: Position saddlebag against Easy Bracket where you want the bag to rest permanently. Be careful to stay clear of pipes and shocks and make sure the bag is level. Person two: Mark the location of the bracket on the back of saddlebag with a sharpie. Do a line at the top and a line at the side so you can be sure your bracket is installed where you intend.
5) Lay the bag flat, backside up. Place the bracket onto the back of the bag and mark the four hole locations onto the saddlebag (two holes for the docking posts and two holes at bottom for stability).
6) Use a 3/8-inch drill to make four holes on the four marks.
7) Place Easy Bracket on backside of bag and line up the holes in the bracket with the holes you just drilled. Using a hex wrench, install the kit-included black button-head bolts into the holes from the outside to attach the bracket. When installing the bolt at the keyhole with the lock, make sure the keyhole is in its open, unlocked position to allow the black bolt into the hole.
8) From the inside of the bag, install fender washer and nylon nut onto the black button-head bolts. Now you’re ready to attach the saddlebag to your motorcycle using the bracket. Make sure to lock it in place with the key lock.
The Great Bike Gear Easy Brackets come with a warranty, FAQ sheet and a technical support number in case you encounter any trouble. There is also a how-to installation video on the Leatherworks website that is incredibly helpful for you visual learners (like me).
Packing and Toting Field Test
In the installation instructions the Easy Brackets warn not to exceed 15 pounds of weight on the Easy Bracket system. Logically, this includes the weight of the bag and the weight of your gear together.
If you’ve ever worn a really nice leather jacket or handled a high-quality saddlebag, you know high-quality leather has some weight to it. This made me a little nervous: will the weight of my saddlebag decrease my ability to use the saddlebag?
Without regard for weight, I packed the bags full with clothes and items I would want in preparation for a fantasy five-day trip to see how the weight limit would require me to adjust my packing. In the brown custom 120 (1,560 cubic inches of interior space) I was able to pack the following list with the lid closing all the way and the buckles on their standard setting (hole number four):
– 5 shirts
– 2 jeans
– 5 socks and underwear
– A hooded sweatshirt
– A pair of Tennis shoes
– Full-size toiletries including: toothpaste, brush and dental floss, Face wash, sunscreen, lotion, body wash
The final weigh in? The bag alone, without any gear in it, weighs 7 pounds and all my gear weighed in at 6 pounds making a total load of 13 pounds; two pounds under the limit. Thanks to the extra long straps I was able to utilize my extra two pounds by adjusting the straps from hole 4 to hole 7 and adding a raincoat to the bag. After this adjustment the bag itself looked a little more stuffed but the straps clicked into place without problem and the bag closed securely. Because the bag lids are reinforced, another option is to strap additional cargo to the top of your saddlebag and then cinch down your top load with the adjusted straps.
In the black 112+2 (1,344 cubic inches of interior space) I was able to fit all of my above items except the toiletries. The black 112+2 also has adjustable straps that accommodate a little extra at the top if needed. Weighing in at 7 pounds, like the 120, the 6 pounds of packing load worked fine with the 15-pound Easy Bracket weight limit.
In terms of touting, the Easy Brackets make it convenient to take your saddlebags with you when you park, which is a great factor that is very important for most motorcycle tourists. With 7 pounds of bag, 6 pounds of luggage and 4 pounds of bracket attached to the saddlebag, one bag weighs 17 pounds when it’s off the bike. Because of the nature of saddlebags, you’d be carrying the bag like a briefcase with the top carry handle. For me, a 5’5 medium-size woman, 17 pounds is doable briefcase-style, but maybe only to my hotel room. I think carrying a bag this style on a hike would leave my arms tired pretty quick…but then again, I am on a five-pound weight exercise routine, so, the comfort level for carrying this bag will differ from person to person.
Would I tour with these bags? Absolutely. With one saddlebag I can fit all my clothes for a whole week leaving my second bag for my tool kit, raingear, maps, snacks and other personal items. The lid clips make it easy to strap sleeping bags or other items on top of the bags to compensate for camping gear or other tour-specific needs.
In Conclusion and my Favorite Part
When I first opened the box, I was blown away by how nice these bags look. They’re classically styled with a smooth finish and a great smell; they brought back a nostalgic memory of the saddlebags I grew up watching my mom’s friends tour with. It’s the subtle modern additions that really make these bags not only cool, but also convenient, though.
I really like the extra long straps that look like a classic belt-closure buckle, but really click closed with hidden easy-open plastic connectors for quick no-fuss entry. I also love that the extra length of the straps combined with the reinforced lid allows you to carry extra cargo on top of your bag.
What I think truly makes Leatherworks bags stand out from the rest is the custom options and even from there, your ability to customize the custom options because each bag is American-made by a person. If you want chrome spots, but think our test bag has too many, you can tell Leatherworks exactly how many spots you want and where you want them when you order. When in use, your motorcycle luggage becomes an accessory to your bike and, unavoidably, a part of your identity as a motorcyclist. I think it is great that the Leatherworks saddlebags offer a wide-variety of versatile options for all types of people and all types of trips. I would recommend Leatherworks saddlebags to anyone looking to tour but wanting to maintain that traditional look (and smell).
What you’ll find in the box and how to order your own
The black 112+2 bolt-on saddlebag (Product No. 112BO+2) is part of the Leatherworks Inc. standard line and can be ordered as a single bag or a pair. At 12x16x7, the 112+2 is two inches larger than the standard 112P (12×15.5×7) and can be ordered as a zipper detachable with the yoke under the seat or a bolt on intended to work with the Easy Brackets or direct bolt-on kits. Our test 112+2 has a custom 2-inch braid added to the lip of the lid. Retail for this bag, including the braid, is $495 for a set of two.
The 120 bolt-on bag is also a part of the Leatherworks standard line and can be ordered as a single bag or a pair. Our 120 bag was a custom brown model with braid, basket weave, chrome studs and a key lock added in addition to the medium brown leather in exchange for the black (Product No. 120BOBRBWSLK2). The 120 measures 13.5x18x7 inches and is recommended by Leatherworks for use with larger bikes. Like the 112, the 120 can be made zipper detachable with a yoke, or bolt on to work with Easy Brackets or direct bolt-on kits. The 120 is the Leatherworks’ best Softail bag, but it will not work with Dynas or Sportsters. Retail for the custom 120BOBRBWSLK2 is $739.00 for a set of two bags.
The Great Bike Gear Easy Brackets kit is available in 80 model options at a base price of $154.95. This price includes both the left- and right-side brackets and all the mounting hardware required. The turn signal relocation kit for Softail, Sportster and Dyna models is available for $49.95-$89.95 depending on your model.
All Leatherworks Inc. bags and brackets can be ordered through the Leatherworks catalog or from a Leatherworks dealer. To order a catalog, locate a dealer, or for more information please visit www.LeatherWorksInc.com or call 888-265-9650.


