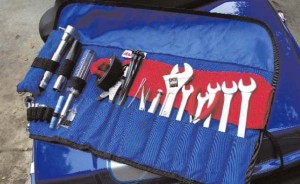
Harley-Davidson motorcycles are more reliable now than at any other time in their 107-year history, but they are also much more mechanically and electrically complex. These last factors usually mean that if your Harley suddenly stops running, your two most important tools are a cell phone and a towing company contact. That does not mean, however, that you shouldn’t carry a decent set of tools in your saddlebag.
The difference between the tools you should carry today, and those you might have carried in the past, is determined by what is fixable. While roadside stops for clutch adjustments, chain tightening, points gapping and carburetor clean-outs were once a regular part of long trips, today these tasks are mostly nonexistent, but they have been replaced with new ones.
The idea behind today’s tool kits is to get you back up and running after a minor get-off, or a shunt with damaging objects. Examples of this might include a low-speed slide-out in a gravel-strewn curve, your motorcycle falling over in a parking lot, or a close brush with a car. Assuming you haven’t hurt your physical self, damage sustained in these instances is usually relatively minor, but often needs a couple of tools to make things ridable again.

For instance, that low-speed slide-out usually ends up bending handlebar control levers and the bar itself, particularly on the unfaired models. So, you need to carry the tools that will enable you to loosen and reposition the lever assemblies and handlebar. Floorboard and foot-control assemblies are also prone to damage. Other examples of reparable damage include fenders bent into tires, sheared saddlebags, broken lights, and engine guards bent back too far. Additionally, many riders have fitted accessories that are easily damaged or, more usually, have a tendency to shake loose. These include things such as GPS mounts, racks, and numerous other aftermarket items that can be attached to the motorcycle.
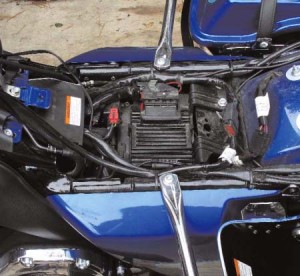
Batteries are no longer easily accessed, so you’ll need the tools necessary to remove the side cover or seat. On most Harleys just removing the cover won’t hack it as the battery is layered over with various other components.
There are several tool kits on the market that will handle this work. Before purchasing one you’ll want to make sure that it is the right one for your motorcycle, and determine what, if any, tools need be added to it. The more changes you’ve made to your bike, the more important this step is. With pen and paper in hand, take a slow walk around your motorcycle. Look critically at the various damage-prone components, and then determine which tools would be necessary to reposition, remove, or possibly repair them. Secondly, determine which tools are needed to access and remove your battery. Then using this list, compare it with what’s available from various tool suppliers (three of my favorites are listed below). From these sources you’ll be able to build a tool kit that meets your specific needs.
Finally, a bit of advice regarding tool kits. Cheap tools can be very expensive as they can damage expensive parts by slipping due to inaccurate sizing, or by breaking; buy the best tools that you can afford. A couple of feet of industrial-strength duct tape should also be a permanent part of your tool kit. Top all this off with an excellent multi-tool and you’ll be ready for the road.
Recommended tool suppliers:
Motion Pro: motionpro.com
CruzTOOLS: cruztools.com
Leatherman multitool: leatherman.com
[This article was originally published in the April 2010 issue of American Rider magazine]


