Editor’s Note: The EarthRider blog series focuses on adventure/off-road riding skills. If you haven’t read it already, check out our previous installment, EarthRider02: Stop Anticipating the Stop.
Generally speaking, unless you really push things on pavement–probably beyond safety or legality–you’re a lot more likely to suffer an inadvertent get-off in the dirt. Much of the challenge of off-pavement riding resides in our ability to use the controls with smoothness and subtlety. For this reason, I recommend that adventure riders optimize control lever setup for off-road riding.
Read EarthRider 01: Meet Laine MacTague
Some of these adjustments may feel weird on pavement at first. They may even feel awkward off-road. Give it time. As you gain more experience, your riding position and style will evolve, and as they evolve what feels good on the bike will also change.
Let’s start feet-first.
The main challenge with foot lever setup stems from the fact that we’re usually seated when riding on pavement and standing up on the pegs when riding off-road. In general, our toes rest a little higher when we are standing than when we are seated.
Shift Lever
New boots, and/or beefy adventure riding boots with a lot of protective plastic, can take a long time to break in and will never be as supple as a light pair of street riding boots. They may require more use of your upper leg joints rather than just your ankle to shift. You’re going to need to get used to shifting while standing, too.
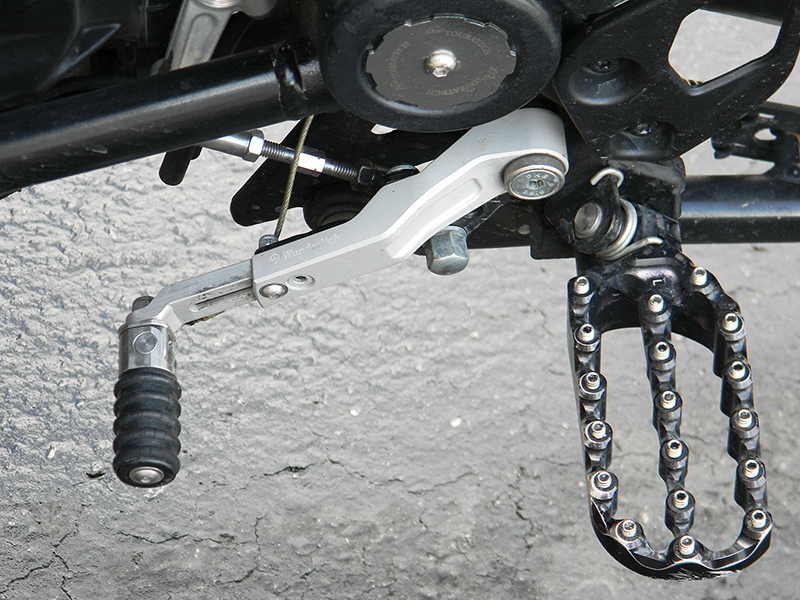
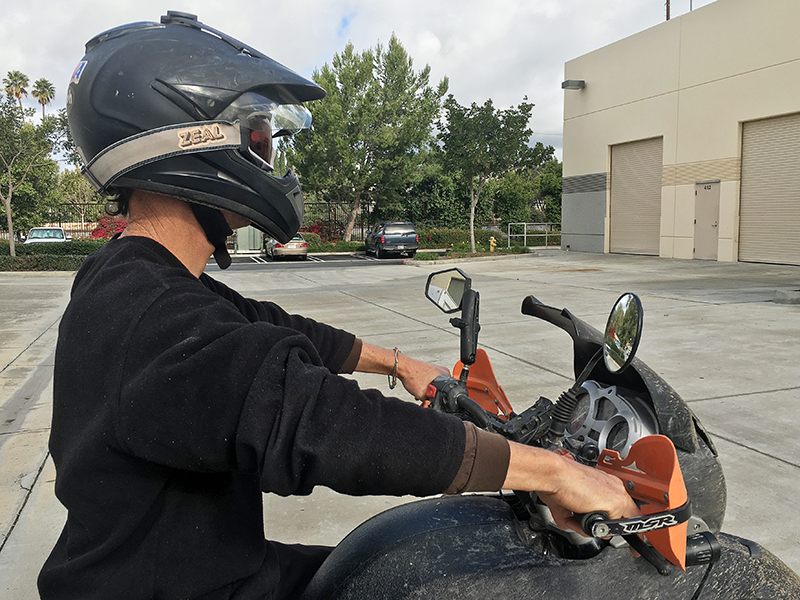
Find yourself a section of smooth, simple unpaved road (R1 on my Trail Rating System) long enough to allow you to run up and down a few gears. Stand up and shift through the gearbox a few times. You may struggle a bit at first. If you have trouble getting your toe under the lever, you may need to raise it to a higher position. Or, if you have to lift your toe up excessively high to reach the lever, you may need to lower it. (Many shift levers are clamped onto a splined shaft. To adjust the lever’s height, loosen the clamp, slide the lever off the shaft and rotate the lever up or down before sliding it back onto the shaft and retightening the clamp. Make sure you have the proper tool(s) you need to make lever adjustments while you’re out on the trail.) Adjust your shift lever until shifting feels easy and natural while standing on the pegs. If your lever doesn’t allow you to make the height adjustments you’d like, consider shopping for an aftermarket one that will. Some aftermarket levers can even be extended or retracted to accommodate large or small feet (see photo at the beginning of this column).
Once you get your shifter adjusted, shift up and down through the gears while seated to make sure you can still operate the lever comfortably. There isn’t a right or wrong setup; you’re looking for what you can work with on pavement as well as off. My own experience has been that minor struggles shifting on pavement are insignificant relative to the consequences of struggling to shift when off-road. Furthermore, the initial weirdness of using your off-road shifter position on the street should decrease after a short time. My suggestion is to lean toward your off-road setting, and give it some time on-road before making more street-comfy changes.

Rear Brake Lever
I’ve met a brake lever or two lately that seemed to have no adjustment at all. Most–like shift levers–can be raised or lowered, and some can be extended or retracted. There are a host of aftermarket options for many adventure bikes, so don’t suffer with what you’ve got if it doesn’t work for you.
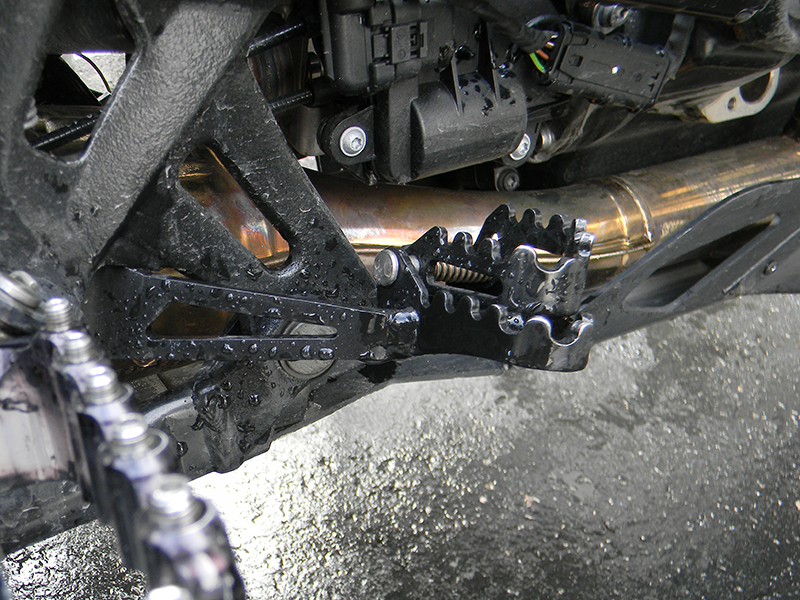
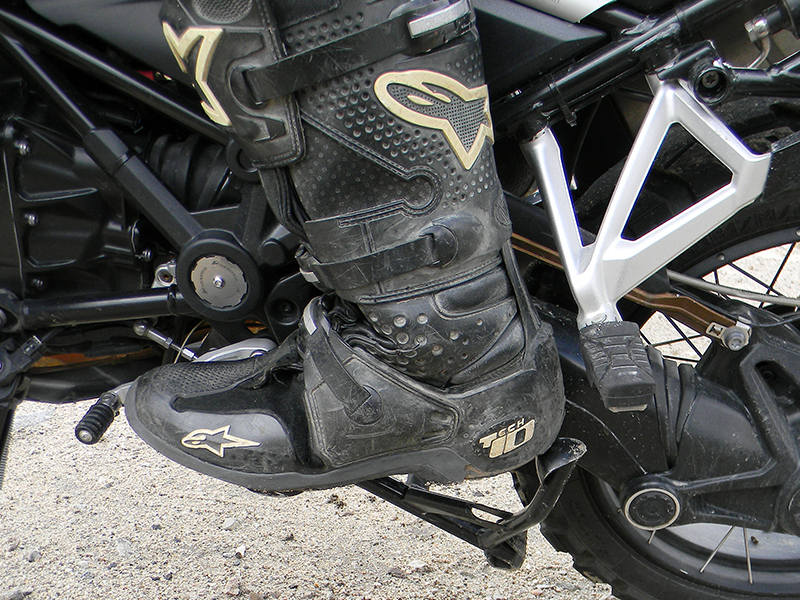
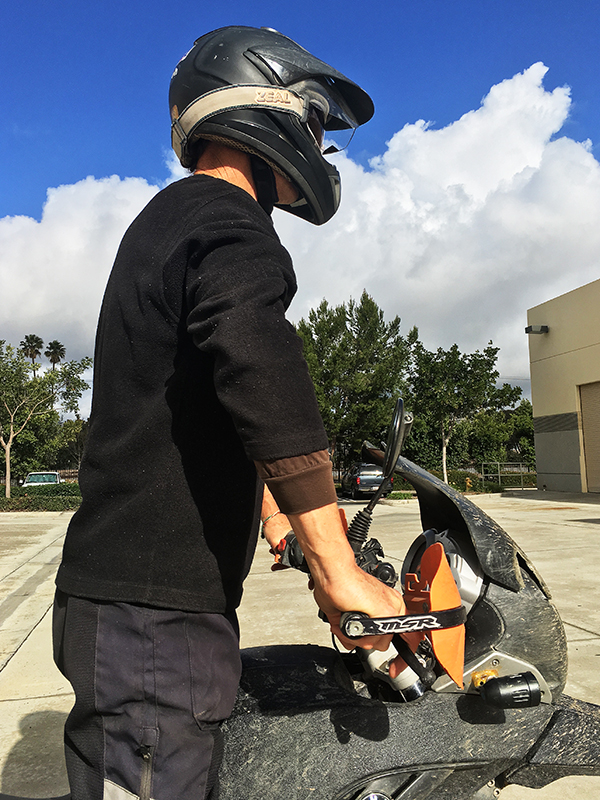
The best brake lever setup is a wide, low platform for use while seated, and a higher, narrow platform close to the body of the bike for use when standing. Some adventure bikes offer this dual setup out of the box (see photos above). Your motorcycle brand and model will dictate whether your stock lever is sufficient and/or what aftermarket choices you have. Whatever setup you choose, make sure that when seated you don’t drag the brake at rest, yet can apply full braking when needed. Make sure that when standing, you can apply full braking without lifting your foot off the peg, and that there is space for your toes to move below the brake lever without hitting it.

Clutch and Front Brake Levers
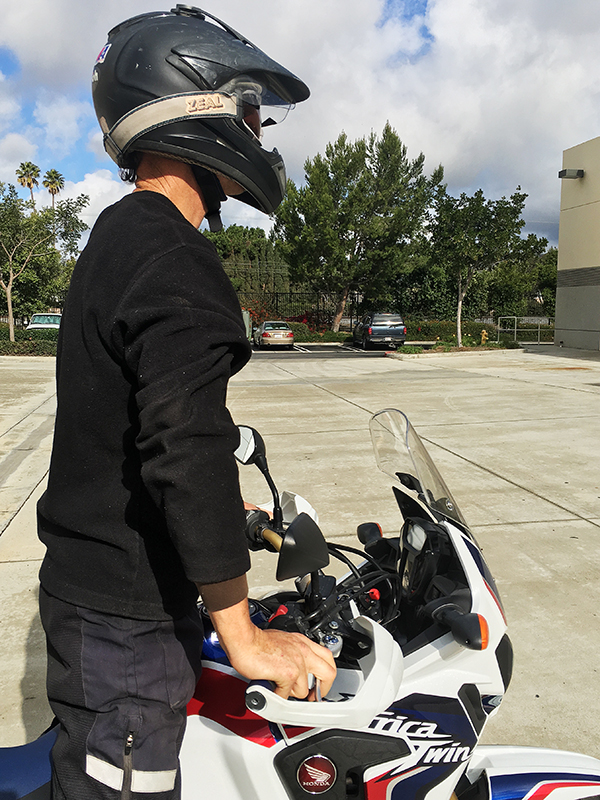
As far as hand levers go, you’ll need to lower both the clutch lever (if you’ve got one) and the front brake lever for off-road riding. To minimize forearm fatigue, adjust the levers to allow your wrists to remain as straight as possible during stand-up riding. If you draw a line from your elbows to the hand levers, the grips should fall more or less on that line. We’ll talk more in the future about off-road riding position, but in a nutshell, your elbows are high when standing (which should be most of the time off-road) and low when seated.
Adventure bikes do a lot of stuff really well, but rarely do they do any one thing perfectly. Here again, we need to decide where we want to maximize performance—on-road or off-road—and lean toward that in our setup choices. In my training classes, I have students start off by adjusting their levers as low as they can. Then, after enough seated riding for the novelty to wear off, if they continue to have difficulty or discomfort using their levers in the low position, to raise them in small increments until they find a position that strikes a good compromise between their ability to control the bike off-road (while standing) and on-pavement (while seated).
“As low as they can” is almost never as low as desired. On adventure bikes, there is almost always something in the way of lowering your levers to the ideal position for stand-up riding. On some bikes, adjusting the lever position requires moving the mirrors and hand guards as well. If you want the levers low but still want the hand guards to be in front of your hands, you may need aftermarket guards that allow more adjustability. If you don’t want the mirrors to hit the windscreen with your new setup, you may need aftermarket mirrors or a different windscreen. In other cases, a good setup is easier to achieve with aftermarket handlebars.
On my own motorcycle (a BMW F650GS Dakar), I installed aftermarket hand guards that provide clearance for the levers below the guard mounts, as well as adjustable mirrors with two ball joints (one near the mount and another near the mirror) that allow nearly infinite adjustability. After these changes, I was able to lower my clutch lever as far as I wanted, but the brake lever stopped a little early because the banjo coupling for the hydraulic line hit the handlebar. I managed to get the clutch lever low enough that a long day seated left me with mild front forearm soreness. I raised the lever a fraction of an inch and the discomfort while seated ceased. My wrists are almost straight when I stand; I experience minimal fatigue and have no problem getting–and staying–in an optimal standing riding position.
We’ll continue our discussion of bike setup in the next column.
For more information:
EarthRider’s SkillzDrillz schedule
EarthRider’s Facebook page
Email Laine MacTague at EarthRider.amgi@gmail.com

 | Ep. 69 Rider Magazine Insider Podcast")


 | Ep. 69 Rider Magazine Insider Podcast")